Configuring Cisco devices to authenticate management users via RADIUS is a great way to maintain a centralized user management base. Traditionally this has been done using the Cisco Access Control Server (ACS) which of course is fairly expensive and is typically out of the price range for most small & medium sized businesses.
If you are like most businesses you may already have an Active Directory infrastructure deployed and thus you already have the necessary software and licenses required to setup a basic RADIUS server using Network Policy Server (NPS) which can be used to authenticate network administrators on your Cisco IOS equipment for management purposes. The main benefit you get from RADIUS authentication is a centralized management console for user authentication and the ability to control which users have access to the Cisco CLI. So look at it this way; if your company hires or fires an employee than whatever changes are applied in Active Directory will take affect immediately. Such as disabling a user account in AD would result in failed authentication attempts for that username when attempting to log into a Cisco device. Also if you have a new employee, you can easily give their username access to Cisco network devices just by adding them into a Security Group in active directory.
This blog will discuss and demonstrate the configuration of Network Policy Server which is included with Windows Server 2008 and greater however will blog concentrate on Windows Server 2008 R2.
Active Directory Configuration
First there are a few small task you must complete in Active Directory. You must create two Security Distribution Groups called Network Engineers and Network Support Technicians
Network Engineers will have level 15 privileges and thus have full read/write permissions to the Cisco Command Line interface after successfully authenticating to Cisco routers and Switches.
Network Support Technicians however will only have Read Only privileges.
Next you will need to assign users to these groups. For the purposes of this blog I have created two users, John Doe and John Smith.
John Doe (Username: jdoe) is a Network Engineer and John Smith (Username: jsmith) is a Network Support Technician. These users will be used to verify the configuration and operational status of NPS.
Once you have completed the basic Active Directory configuration you can move on to the NPS config. Please note that the Security Groups can be named whatever you like.
Windows Network Policy Server Configuration
Prior to configuring NPS it must first be installed and authorized in Active Directory. To install NPS add the “Network Policy and Access Services” role to your server.
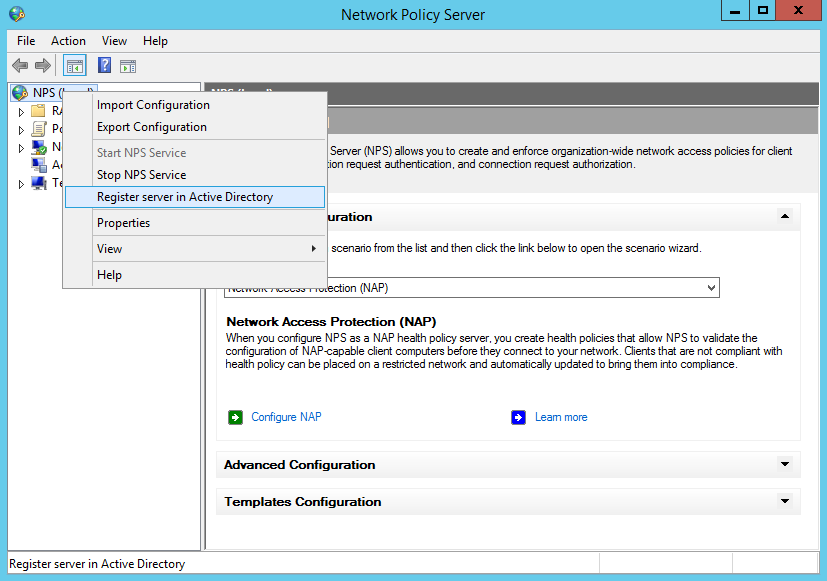
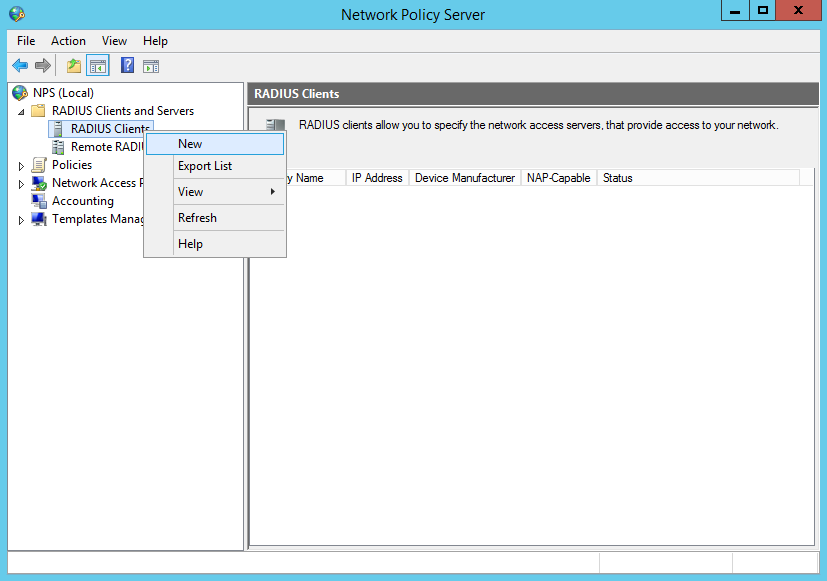
After you have authorized NPS in Active Directory you’re ready to add the first RADIUS Client. To add the client you must expan the RADIUS Clients and Servers line and right click on RADIUS Clients and click “NEW”.
You’ll be prompted to enter the Friendly Name and Address, IP address and Shared Secret. Enter this information as required. For this blog we’re using R1 which had the IP address of 172.16.22.215 and the secret of CISCO as shown below;
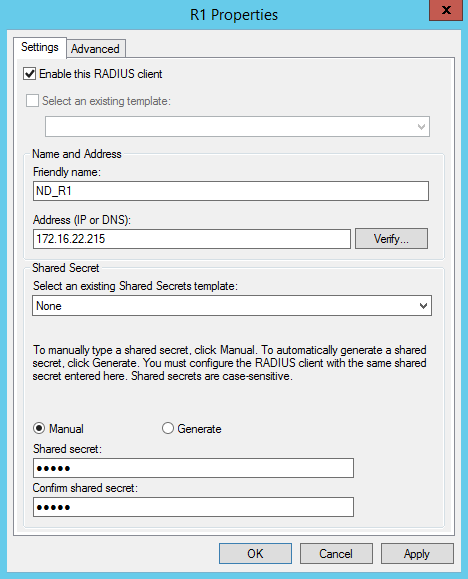
Note that ND_ is used as a prefix to the device friendly name, this will be used later in the configuration of the NPS Policy which can identify network devices.
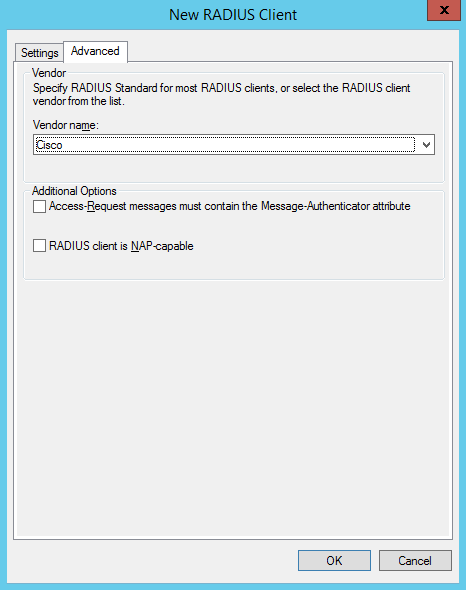
Next, click the Advanced Tab across the type and select “Cisco” as the vendor name from the drop down list and click ok;
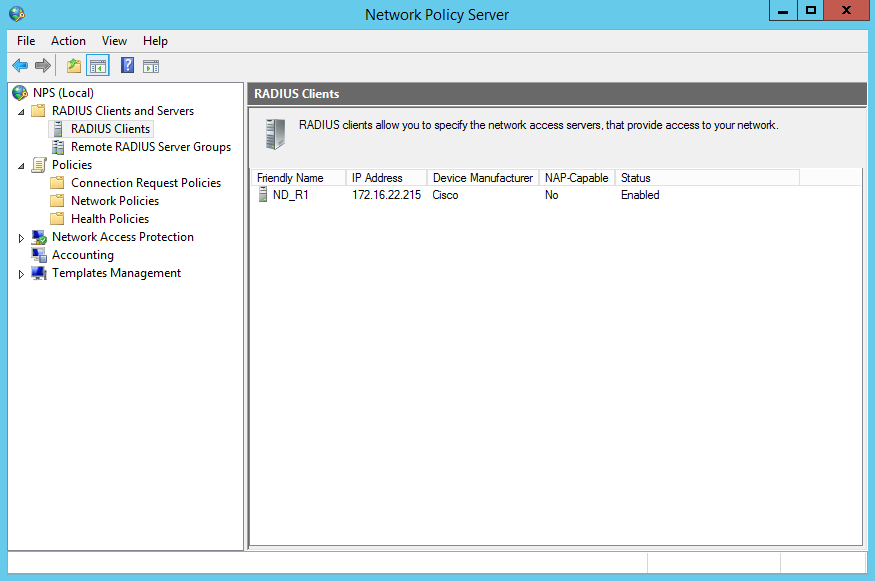
If you added the client correctly you should see the client friendly name, IP address and other information listed in the RADIUS Clients section;
Now you’re ready to configure the network policy which will authenticate users in the specific active directory groups and grant them access.
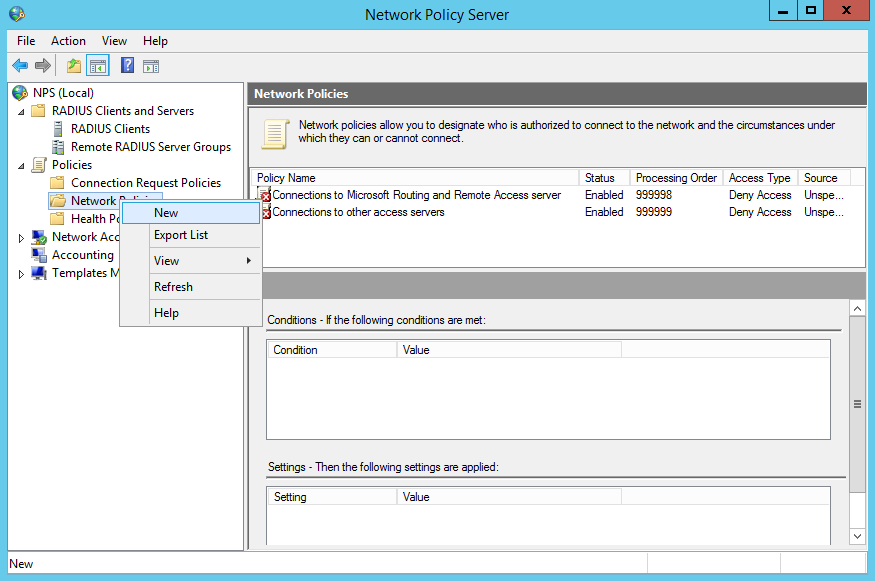
to create a new policy you need to expand the Policies item in the left list and right click on “Network Policies” and click NEW.
You must enter a name for the policy, in this case we’re going to use “Network Engineers (Cisco LEVEL 15)”

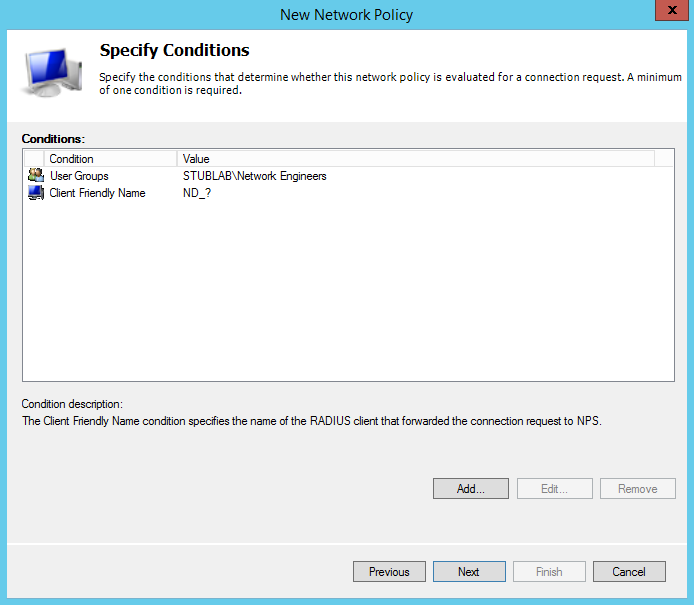
After you have provided a policy name you must than configure the conditions which are required to match in order to successfully authenticate. You will need to create two conditions;
Configure a User Group to match the Network Engineers security group and the Client Friendly Name to match “ND_?” which denotes the device authenticating has a friendly name starting with ND_
Once you’ve successfully added these conditions you should see the following;
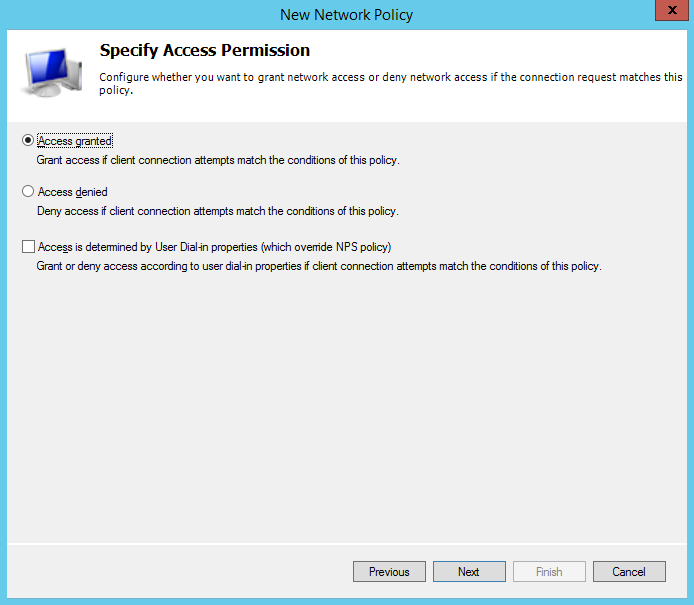
Click next and you’ll be prompted to specify the access permission, leave this as the default “Access Granted” and click next.
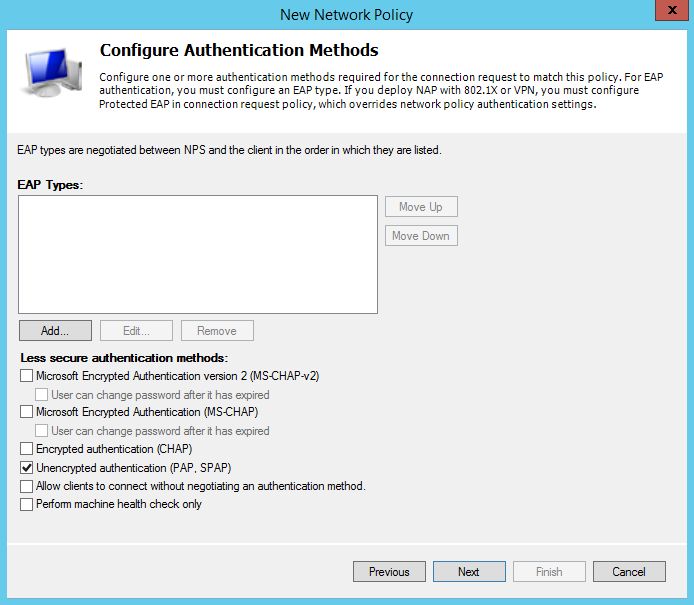
Cisco only supports the “Unencrypted authentication (PAP, SPAP) methods. Uncheck everything and check “Unencrypted authentication (PAP, SPAP) as shown below and click next;
After configuring the Authentication Methods you will be prompted to configure the Constraits, you can skip this section and just click next.
When prompted to configure settings, remove the Framed-Protocol and edit the Service-Type and set it to “Login” which is under “Others” as shown below;

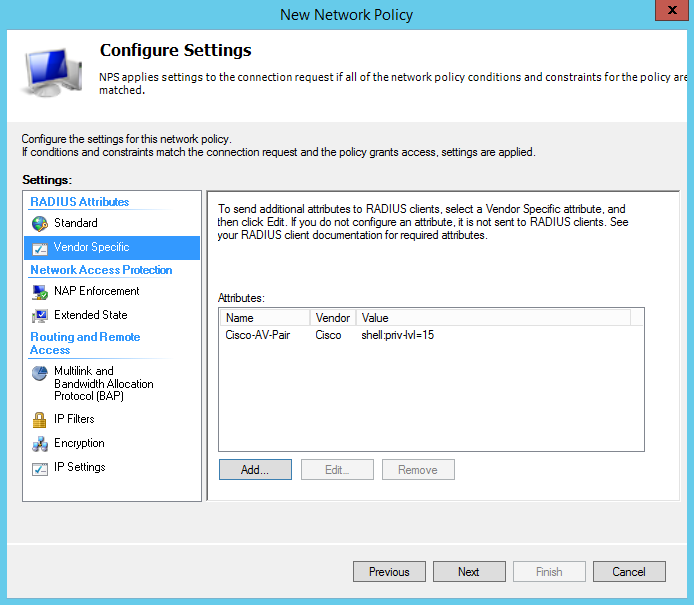
Next you will need to add a Vendor Specific Attribute by clicking on “Vendor Specific” under the left side settings and clicking the Add… button
Scroll down the list and select “Cisco-AV-Pair” and click add. You will be prompted to add the Attribute Information, here you will click Add… and set the attribute value as shell:priv-lvl=15
This specifies which privilege level is returned to the authenticating user/device after successful authentication. For Network Engineers this would be shell:priv-lvl=15 and the Network Support Technicians would use shell:priv-lvl=1
When added successfully you should see the following;
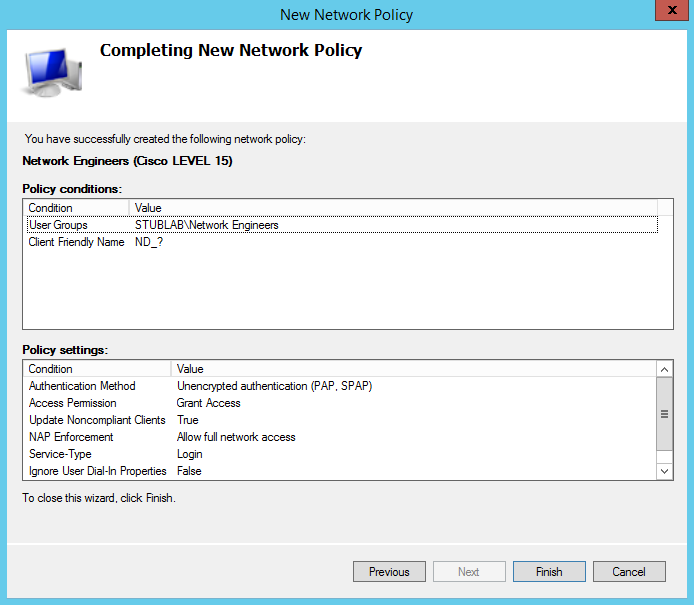
After you click next you will be presented a summary of the new network policy that you just created as shown below;
Click finish and you’re ready co configure the Cisco Routers and Switches to authenticate to the NPS Radius Server. Please note that you will need to create another policy for the Network Support Technicians and any other privilege levels you wish to use.
Cisco IOS AAA Configuration
The very first thing we need to do prior to configuring AAA is to setup a local user account so that when the RADIUS server has failed, you have the ability to still log into the device. This is done using the username command as demonstrated below;
R1 con0 is now available

Press RETURN to get started.

R1>enable
R1#config terminal
Enter configuration commands, one per line.  End with CNTL/Z.
R1(config)#username NORAD priv 15 secret R@du3F@1led
R1(config)#
Now we can enable AAA new model and configure the radius server group and default authentication list as demonstrated below;
R1(config)#username NORAD priv 15 secret R@du3F@1led
R1(config)#aaa group server radius NPS_RADIUS_SERVERS
R1(config-sg-radius)#server-private 172.16.22.228 auth-port 1812 acct-port 1813 key CISCO
R1(config)#aaa authentication login default group NPS_RADIUS_SERVERS local
R1(config)#aaa authorization exec default group NPS_RADIUS_SERVERS local if-authenticated
R1(config)#aaa authorization console
INFO: Users will ONLY authenticate to the RADIUS servers if the RADIUS server is alive when defining the default aaa authentication list using group NPS_RADIUS_SERVERS followed by local. If you are attempting to log into the device using a local account and the Radius servers are accessable than it will reject the authentication unless the local account used to log in also exist in Active Directory and are member(s) of the Network Engineers or Network Support Technicians security group.
And that’s it for the basic Cisco IOS AAA config. You can however get into some more advanced configurations by using AAA list and applying a radius authentication list to the VTY lines and local authentication only to the console line.
Verification
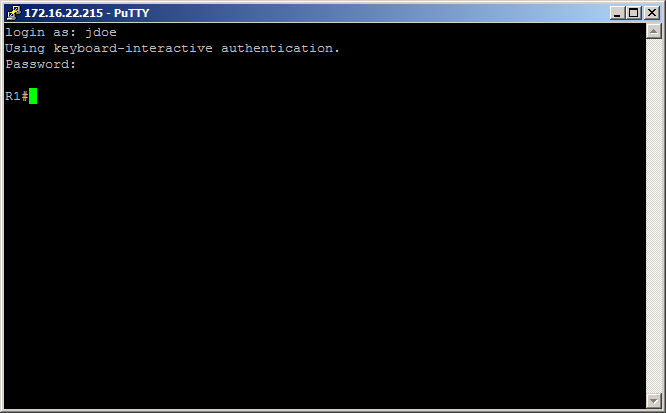
Now for the fun part, verification. If you completed all the steps correctly you should be able to log in using the jdoe username and be automatically placed into privilged mode as demonstrated below;
And also if you configured the second policy for Network Support Technicians, you should be able to authenticate as jsmith and be placed into user mode as shown below;

If you have any questions or suggestions please comment 🙂

Recent Comments